The Grammar Check works similarly to the spelling and grammar checkers in a word processor. It highlights any word that’s not in our dictionary in case it’s misspelled. It also looks at the construction of the sentence to make sure that the structure, punctuation and tense are correct.
But, in addition to these standard grammar checks, our team of copyeditors have been inputting thousands of specific checks that they have come across in their years of editing. Our goal over the next couple of years is to have a simple explanation associated with every grammar issue that the software picks up.
Getting Started
The Grammar Report checks both spelling and grammar. I’ll cover how to run the report and how to use each part.
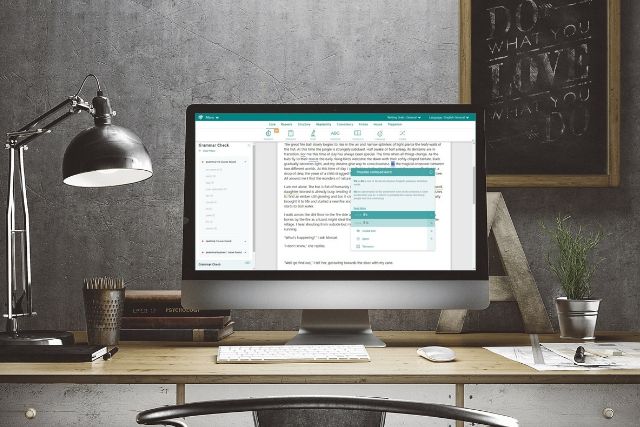
Running the Grammar Report is simple. In your ProWritingAid tool, make sure that you can see the toolbar of different reports at the top of your document. If not, click “Reports.” Then you simply click “Grammar Report.”
After you run the report in the online tool, a box will pop up on the left side. In Microsoft Word, the box will pop up on the right side. You will also see mistakes underlined in red and blue lines in your document.
Spelling
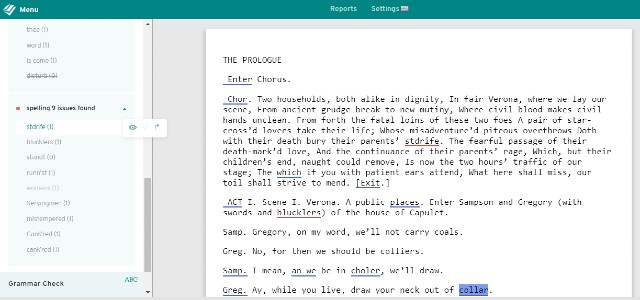
Spelling issues are marked in red within your text. The Grammar Report will generate a list of all the spelling issues, or you can hover over each red line with your mouse.
Once you have hovered over the issues for more information, you can quickly resolve them from the list. There is a number next to each spelling mistake to tell you how many times that same error appears.
Pop-Up Symbols
When you click each item on the list of spelling mistakes, a box will pop up with three symbols.
The first symbol is an eye. This will show or hide these errors. If you make the mistake more than once, you can hide all of them with one click. It might not be an error for your purposes, or you might want the mistake there on purpose. If you want to take care of it later, just click the word again and hit the crossed-out eyeball. The red lines will show back up.
The second symbol on the pop-up is a check mark. This will apply the first suggested change in the text. If you can’t click the check mark, try hovering over the mistake in the actual text first.
Finally, there is a curved arrow. This will take you directly to the error in the text. It’s easy to overlook a red line if there are too many. This button makes finding the individual mistakes much easier.
Suggestions and Add to Dictionary
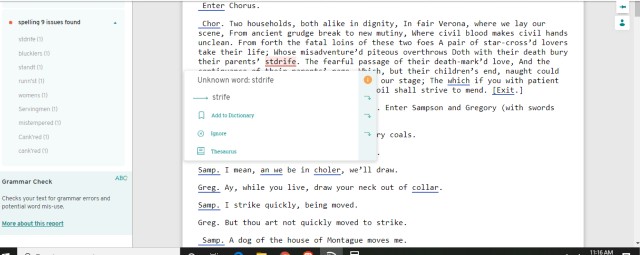
When you scroll over the spelling mistake in the text itself, a bigger box will pop up. There are several features in this box.
The first part of the box is the actual error, which usually says “unknown word” for spelling mistakes. Underneath that is a list of suggestions. These are the words that ProWritingAid thinks you might mean instead. Sometimes, there may be only one suggestion.
Change the word by clicking the correct suggestion. If the correct word isn’t there, you can manually change the word in the text.
Sometimes, the word is correct, but ProWritingAid doesn’t recognize it. It could be a word you made up or simply an uncommon word. You can click “Add to Dictionary” below the suggestions to add the word to your personal ProWritingAid dictionary. This will mean it is no longer flagged as an error. Keep in mind that you may have to add different forms of the word, such as singular and plural, separately.
The downward-curved arrows next to the suggestions or “Add to Dictionary” are a handy shortcut. If you click the arrow next to the suggestion, the word will change in the text, and then immediately move to the next arrow with a new pop-up box. Likewise, clicking the arrow next to “Add to Dictionary” will add the word to your dictionary and move to the next error without you having to scroll to it.
Ignore and Thesaurus
Below “Add to Dictionary” is the ignore button. Click this to ignore the error. Clicking the down arrow next to “Ignore” will ignore the word and move to the next error. Unlike "Add to Dictionary," the "Ignore" option is a one-time thing: if you re-run the grammar report, the mistake will be flagged again.
If the word is a recognized word, it might be in the ProWritingAid thesaurus. You can click “Thesaurus” to see synonyms. But if the word is not recognized, you will not have any options for additional words.
Grammar
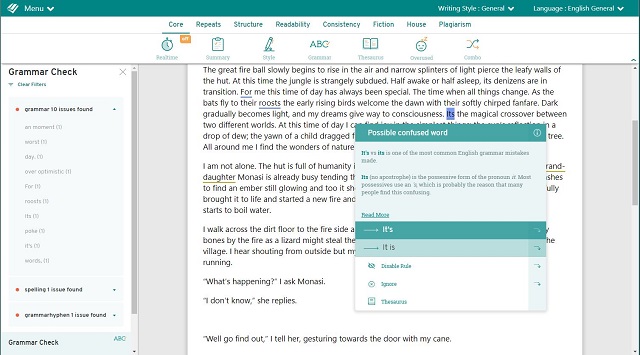
Grammar issues are marked in blue within your text. The grammar features have a lot of similarities with the vocabulary pop-up boxes. Here are the few differences.
Grammar Rules and Suggestions
The first line of the pop-up box will give you a succinct explanation of the broken grammar rule. It might say something like “possible confused word” or “missing punctuation.”
Below the short explanation is the list of suggestions. ProWritingAid can identify many grammatical errors and suggest how to fix them. The errors could be something simple like subject-verb agreement. It could also be a more complex grammar rule like, “Intransitive verb can’t be used in passive voice.”
Pick the correct suggestion to automatically change the text. If the correct suggestion isn’t present, you can manually fix the error.
Disable Rule and Ignore
Below the grammar suggestion list, there is an additional button called “Disable Rule.” This is different from ignoring that specific occurrence. Disabling the rule will stop ProWritingAid from checking for that particular grammatical rule in the entire text.
As with the spelling rules, clicking “Ignore” will simply ignore that particular instance of the grammatical mistake. The same mistake will still be marked in future occurrences.
Learn More
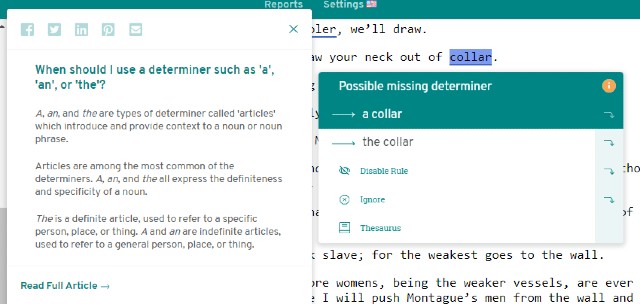
Sometimes, you’ll notice an additional button in the pop-up boxes for both spelling and grammar errors. In the right-hand corner of the box, there might be an orange circle with an i in it. Clicking this button will give you more information about the rule that was broken.
This will explain the spelling or grammar rules in more detail. You can also click “read the full article” for an even more in-depth explanation. At the top of the “Learn More” box are social media sharing buttons. This allows you to quickly share the articles to various sources for future reference.
Specific Examples
We also offer specific examples of grammar errors. Here are some of them.
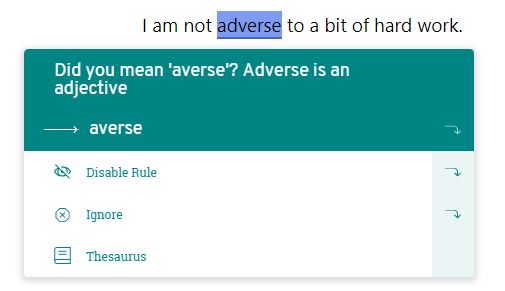
Example 1: “Adverse” vs. “averse”
One of our editors noticed that writers often mistake “adverse” with “averse”. One is an adjective, the other is a verb. They created a programming rule around this issue. So if you have a sentence construction that uses “adverse” as a verb, the grammar checker will highlight it and offer the following explanation:
Example 2: “Allows” followed by a gerund
Another of our editors noted that the word “allows” should never be followed by a gerund. A gerund is a verb that has been turned into a noun by adding -ing. “Walking on the beach is my favorite pastime” or “John was afraid of skydiving”.
So, any time the software finds this construction, it highlights it and offers this explanation:
Allows + gerund, e.g. "allows identifying", is incorrect.
You need use the infinitive (base) form of the verb instead of the gerund (-ing) form of the verb. You also need to include an object, giving the structure allow + object + infinitive, e.g. "allows it to be identified".
Alternatively, you could use the noun form of the verb with the structure allows + noun + preposition, e.g. "allows identification of", followed by the object.
Our editors have created thousands of these checks and the list continues to grow each week.
We hope that our explanations will build the knowledge of our users and help them become better writers!

Be confident about grammar
Check every email, essay, or story for grammar mistakes. Fix them before you press send.
